A Practical Guide to Accessible Gravel Paths for Wheelchairs & Walkers

Get an estimate for your project in 60 seconds
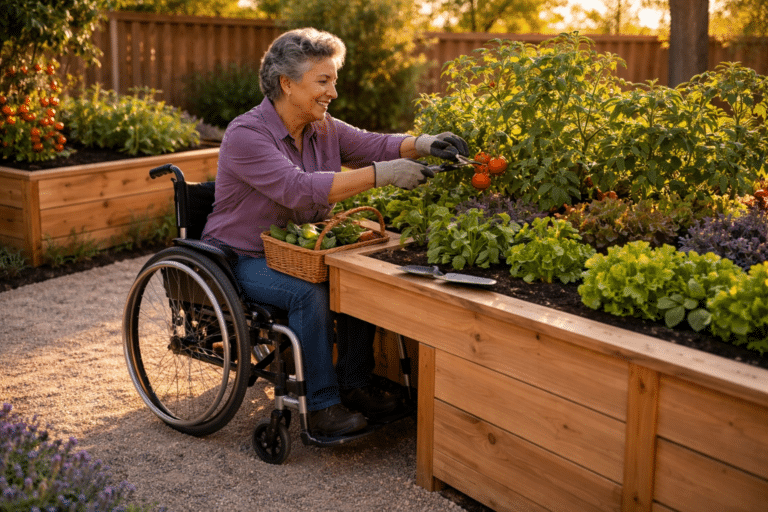
While standard loose gravel is not suitable for wheelchairs or walkers, you can create a firm, accessible surface using the right materials and methods. The solution involves using compacted, fine-grained aggregates like decomposed granite or crushed limestone over a solid, well-prepared base. When properly installed and stabilized, these materials provide the firm and stable surface required for safe mobility.
Why Most Gravel Fails And How to Make It Work
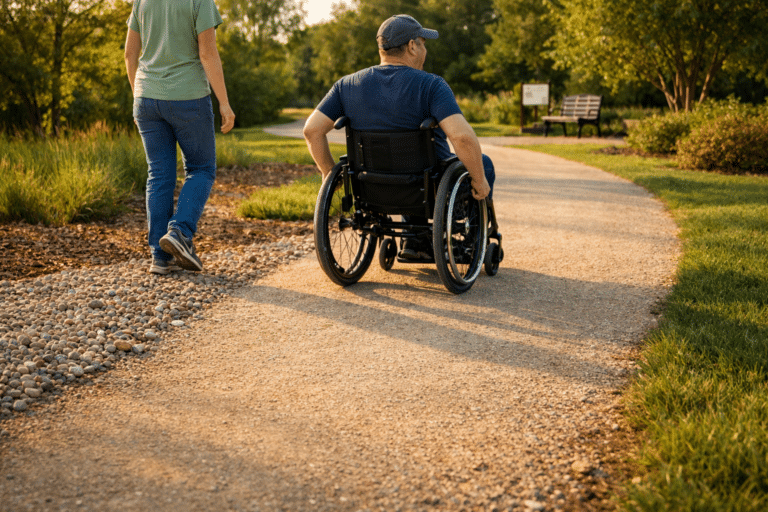
Most people assume gravel and accessibility don’t mix, and for round, loose stone like pea gravel, they’re right. The Americans with Disabilities Act (ADA) requires accessible paths to be firm, stable, and slip-resistant. Loose gravel fails on all three points, creating a shifting surface that sinks wheelchair wheels and catches walker tips.
However, the ADA does not prohibit gravel itself, only surfaces that aren’t firm and stable. Compacted angular gravel can meet these requirements, making it a viable option for garden paths, trails, and other landscaped areas that need to accommodate people with mobility limitations. The same principles apply to residential projects, where a stable surface prevents tipping and falling risks.
Choosing the Right Aggregate for an Accessible Path
The key to a successful path lies in the particle shape and size of the aggregate.
Decomposed granite (DG): This is a top choice for accessible gravel paths. It consists of fine particles that compact tightly to form a surface nearly as firm as packed earth, yet it still allows for good drainage. When mixed with a polymer binder, it holds up exceptionally well under regular wheelchair and walker traffic.
Crushed limestone and crusher fines: They are also called quarry screenings and are strong alternatives. Their angular, irregular edges interlock when compacted, creating a stable surface that resists shifting. These materials are widely available and perform well in most climates.
Avoid pea gravel and river rock entirely. Their smooth, rounded shape prevents them from locking together, so they roll freely under pressure. A wheelchair wheel or walker tip will sink into this type of material, making it unsafe for an accessible path.
Key Point: The shape of the aggregate is non-negotiable. Angular stones (like crushed limestone) interlock to create a firm surface, while rounded stones (like pea gravel) will always shift and are unsafe for mobility aids.
How to Build a Stable Foundation
A functional accessible path depends on a solid sub-base. The surface material is only as good as the foundation beneath it.
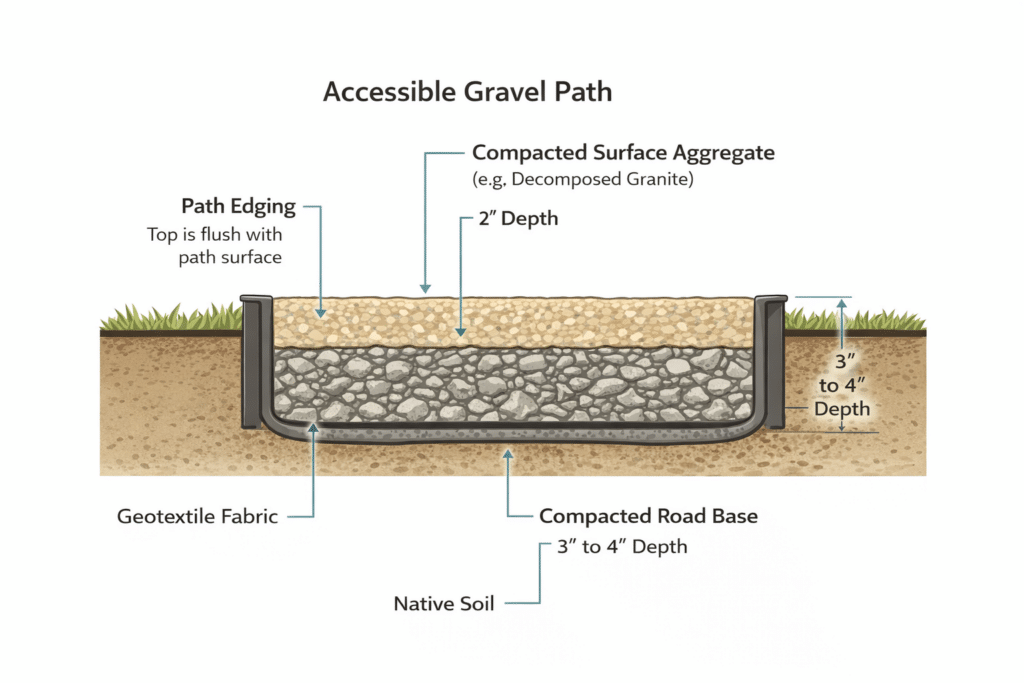
First, excavate the path area to a depth of 4 to 6 inches. This creates room for your base and surface layers without raising the path above the surrounding ground.
Next, lay down geotextile landscape fabric across the excavated trench. This fabric serves two purposes: it suppresses weed growth and prevents your base material from mixing with the native soil below.
Add a 3- to 4-inch layer of road base or another coarse, crushed aggregate. Use a plate compactor to compact this layer until it feels solid and no longer shifts underfoot.
Pro Tip: Don’t be tempted to skip the plate compactor. Proper compaction is the most critical step for achieving a firm, stable surface that will last.
Finish with a 2-inch layer of your chosen surface material, decomposed granite, crushed limestone, or crusher fines. Rake it level and compact it again until the surface is firm with minimal give.
Getting the Dimensions and Slope Right
Proper dimensions are just as important as the materials you use.
Width: The ADA requires a minimum width of 36 inches for an accessible path. However, a width of 48 to 60 inches is more practical, as it allows a wheelchair user to turn around or pass someone comfortably.
Running Slope: The slope in the direction of travel should not exceed 5% (a 1:20 ratio of rise to run). Anything steeper is considered a ramp and requires handrails and landings. A gentler slope also helps prevent your surface material from washing downhill.
Cross Slope: The side-to-side slope must not exceed 2% (a 1:50 ratio). This detail is often missed in DIY projects but is critical for safety. A path that tilts to one side forces wheelchair users to constantly correct their direction and creates a tipping hazard for those using walkers. Use a level to check the cross slope at multiple points during installation.
Important: Pay close attention to the 2% maximum cross slope. Even a slight sideways tilt can make the path difficult and unsafe for wheelchair users to navigate. Always verify with a level.
The Importance of Path Edging

Without a border, gravel migrates. Rain, foot traffic, and maintenance will slowly push the material off the sides, narrowing the path and creating soft, uneven edges.
Install a solid edging material like steel, aluminum, or a composite landscape border along both sides of the path before adding the final surface layer. Ensure the top of the edging is at or just slightly below the finished path surface. A raised edge can catch wheelchair footrests and walker tips, creating a hazard.
Safety Note: A raised edge is a tripping hazard. Ensure your landscape border is flush with or just below the finished gravel surface to avoid catching wheelchair footrests or walker tips.
Optional Stabilizers for High-Traffic Paths
For paths that will see frequent wheelchair use or are located in areas with heavy rain, additional stabilization is recommended.
Polymer stabilizers are liquid binders that are sprayed over fine aggregates like decomposed granite. They lock the particles together, creating a durable surface that resists erosion.
Gravel stabilization grids are plastic honeycomb-like panels installed on top of the base layer. The surface gravel fills the cells, locking it in place and preventing ruts and shifting, especially on sloped areas.
Resin-bound gravel is the most durable option. The aggregate is mixed with a clear resin and troweled smooth, forming a continuous, permeable surface that performs like pavement. It is also the most expensive approach.
Maintenance for Long-Term Accessibility
An accessible path requires periodic upkeep to remain functional.
Rake the surface as needed to fill in low spots and redistribute material. After heavy rain, inspect for any washout and add fresh aggregate where necessary. In climates with freeze-thaw cycles, you may need to re-grade and re-compact the path annually.
Always keep the path clear of leaves, snow, and other debris. If the path is used after dark, consider adding low-level solar lighting along the edges for visibility.
Frequently Asked Questions (FAQ)
Is gravel considered ADA accessible?
Not automatically. Standard loose gravel is too unstable. However, compacted fine aggregates like decomposed granite or crusher fines can meet ADA requirements for a “firm and stable” surface when properly installed with a solid base and edging.
What is the best gravel for wheelchair access?
Decomposed granite (DG) is the most common choice due to its excellent compaction. Crushed limestone and crusher fines are also reliable options because their angular shape allows particles to lock together, creating a firm surface.
How wide should an accessible path be?
The ADA minimum is 36 inches, but a width of 48 to 60 inches is much more practical for turning and passing.
What is a safe slope for a gravel path?
The running slope (in the direction of travel) should be 5% or less. The cross slope (side-to-side) should not exceed 2%. Steeper slopes can cause material to wash away and create safety issues.
How do you maintain an accessible gravel path?
Periodically rake the surface to smooth it out, add new material to fill any low spots after heavy rain, and keep the path clear of debris. In cold climates, plan to re-compact the surface each spring.
How much material will I need for my path?
For a standard 2-inch surface layer, you will need approximately 1 ton of aggregate per 100 square feet. Use an online tool to help calculate the amount of aggregate you need for your project.
Planning an accessible path requires the right materials and accurate measurements. Once you have your project dimensions, you can easily calculate the amount of aggregate you need and get it delivered directly to your site.